Thursday 27 May 2021

Make Sweet Music Always & Forever


This wedding card is a commission for a very good friend and neighbour. This is for me the very best reason to make a card as it incorporates so many of the things the recipients like the most and of course the very best reason to make a card (for a romantic like me) a wedding.

The brief was Shabby Chic, wedding colours are navy, pale blue and pale pink. They like David Bowie, Star Wars and have a Bassett Hound.

Now if I am honest I thought I would not be able to include all that but got my thinking cap on and suggested a jukebox with records including their names, song titles and even included a nod to their dog and Star Wars with the Cantina Band. 

The jukebox is a clipart image from HiClipart. I coloured with Promarkers and added some pencil lines to the records and some silver gel marker.

The base of navy blue card has been covered with a pale blue paper from my stash which had a distressed painted effect on it. I tore the edges and roughed them up shabby chic style. I had the perfect ribbon & lace piece in my collection which accents the style.

The wedding sentiment is a freebie from Desert Diva. Hannelie has hundreds of sentiments on her blog and is so generous with them. I have matted this on the Intricate Trellis die from Crafter's Companion and accented with some gems and paper flowers.

The base for the records is a digital stamp from Rhoda Design Studio. This is freebie that is still available to download. I used the main one with hearts to add the bride and groom's names. In my graphics program I created my own version with the same dimensions so it had a clear centre giving more space for text. You can see in the image below a closeup of the text on each one. This will make it so personal to Sarah & Stuart. All the music elements are popped up on foam pads.


The bottom sentiment is one I created myself. I have included here in JPG and PNG formats for you to download if you wish to. If you do use them I would be grateful if you could give credit to me and link back to my blog as I would love to see how you have used it.


I added some smaller paper flowers to frame the sentiment. 
The final touch was to punch some musical notes with an EK Sucess punch. The inside has a printed verse and I used punch to add 2 entwined hearts.

When I gave it to my friend she was absolutely delighted with it. It is the wedding on the 29th May and I really do hope Sarah & Stuart 'Make Sweet Music Always & Forever'

Card Details -


Size - A5

Digital Image - Jukebox (HiClipart) & 45 Record (Rhoda Design Studio)

Digital Sentiment - On Your Wedding Day (Desert Diva) & My own freebie

Die - Intricate Trellis (Crafter’s Companion)

Punch - Musical Note (EK Success)

Colouring Medium - Promarkers

Embellishments - Ribbon/lace, self adhesive gems, paper flowers


I would like to enter this card into the following challenges (in Alphabetical Order)


Tuesday 25 May 2021

Winter Magic Gnome


Over at 12 Months of Christmas Link Up we have a great Christmas themed challenge every month. I LOVE making Christmas cards the best so this is no major hardship for me.


This month Lisa from Decosse's Dynamite Doodles has designed this lovely paper set Gnome For The Holidays which is a prize to the lucky winner who follows the twist of adding a gnome to their card this month.


Whilst planning my Merry Maidens team card using this backing paper I thought it was such a shame that the motif was quite small and you couldn't really see the image. I thought it might be nice to try and use it as a central feature on a card. It is such high quality that even if you enlarge and crop it you get a fabulous image and can use as a toppper.


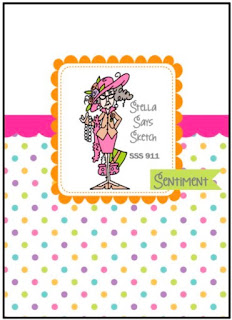
I used the latest Stella Says Sketch 911 from Catch the Bug for the layout.

I used a pale blue card blank as the base and added some printed paper from the Krafty Christmas pack.


The image and paper has been printed into a semi gloss photo paper. It really makes the colours pop. I trimmed the image and added some Stickles glue 'snowflakes' in the background. The image has been mounted onto a frame from the CREAlies set of dies Crea-Nest-Lies XXL 70. You get loads of sizes in the set from small to large and they are so handy for matting images.

Following the sketch layout I added a self adhesive glitter ribbon and put a metallic sticker border top and bottom to make it look taller. Finally the sentiment is from Craftwork Cards and popped up on some thin foam pads.

I hope this project will encourage you to see how much more you can get from your digital supplies by thinking outside the box. That little motif in a paper can be the perfect image for your card if it is good quality when enlarged.

Our challenge at 12 Months of Christmas Link Up is open until the end of the month. You can link up any newly made Christmas cards and the monthly theme is always optional. If you enter a minimum of 2 you can get a free paper from this month's set so it is a great way of building up your digital stash too!

Card Details -


Size - 4” x 6”

Digital Image - taken from Gnome for the Holidays paper (Decosse’s Dynamite Doodles)

Digital Paper - A Krafty Christmas (Decosse’s Dynamite Doodles)

Dies - Crea-Nest-Lies XXL 70 (CREAlies)

Embellishments - Self adhesive Ribbon, Stickles Glitter glue


I would like to enter this card into the following challenges (in Alphabetical Order)


Sunday 23 May 2021

Girl Riding a Bicycle Spinner Card


You know how every now and again you make a card that you are so blooming proud of you could burst? Well this is one of those!

I saw a card my fellow crafter Wendy Batchen made and added to Facebook and her blog. It was a penny slider card and it looked like so much fun. I have never made anything like that and it got me wondering if I could make one.

I already had this image cute Girl Riding a Bicycle image printed from Kinda Cute by Patricia Alvarez to take part in her Progressive Freebie Challenge on Facebook so this was the obvious image to work with.

A current sketch #506 Try Stamping (or Not) On Tuesday looked like it could work and has the option of adding a rainbow. I had this one already made which was the other half of the one I made for my unicorn card last year.


I thought the horizontal ribbon section could possibly work to hide the slider mechanism and be mounted on top of the card. I experimented on some scrap card and found that I had inadvertently made a spinner mechanism. I am assuming this is because I had used a round foam pad. I had roughly cut my image out was so delighted with the spinny bit that I decided to run with that ides. What a happy accident that was

So having decided that was how it was going to go together I then made the actual card. The only cloud paper I had was this green one from a paper pad I bought ages ago cheap from TK Maxx. I considered trying to colour over it in blue but thought I would probably ruin it so left it as is. The black striped paper is from my last 12x12" sheet from a DCVW Glitter stack. I love this paper and wish I could buy a whole pad of it.


The image is coloured with Promarkers and glitter accents have been added with Spectrum Noir Glitter Markers. I added a zig zag pattern to her dress and you get a lovely shimmer from the glittery accents when it spins. The image adhered to thick white card to strengthen it and I added the penny mechanism to the back just under her head. I lightly sanded it with an emery board and added a circle of cardboard. This was then stuck to the image with red back sticky tape so it made it really secure.

The rainbow was made using stitched circle dies, cutting in the relevant colours, mounting onto scrap card to stabilise and then cutting in half. This is the other half of one already used and I couldn't fit all 7 colours on that card so it is not quite a correct rainbow but the blue, indigo and violet seem to merge together in real rainbows too.

The little sunshine is one that I had cut out of a magazine advert years ago and kept as I thought it might come useful. Mounted onto a scrap of card to stabilise and popped up on foam pads.

The slider section is mounted onto foam strips top and bottom making sure they are not in the way of where the penny slider runs. I then used some smaller pads on the sides. I stuck the 3 sides down and gently slipped the penny sandwich inside before sticking the bottom edge down.

Finally the sentiment is one that was recycled/rescued from a shop bought card and I used an almost dry mini inkpad to distress the edges and the card front.

I was like a kid playing with it when I showed my hubby and have an idea for making others using the same mechanism. To get the full effect you can see the video on my Made By Mandy facebook page here or Instagram here


Thank you very much to
Wendy for inspiring me to have a go with this card and opening up some fun possibilities.

Card Details -


Size - A5

Digital Image - Girl Riding A Bicycle (Kinda Cute by Patricia Alvarez)

Dies - Generic Stitched circle dies (unbranded from Ebay)

Paper - 12x 12" Glitter Stack (DCWV), Dear Lizzy 12x12" (American Crafts)

Colouring Medium - Promarkers, Spectrum Noir Glitter Markers

Embellishments - 2 pennies, ink pad for distressing.


I would like to enter this card into the following challenges (in Alphabetical Order)


Jill's 50th Birthday


Today is my sister in law's 50th birthday. We were both born in the same year but my birthday is a few month's away.

I wanted to make something a bit special for her and on a recent shopping trip to The Range I spotted this rather fabulous die. It is really big at over 10cm x 13cm so I knew it would make a great statement on a card. It is Another Candle from Sue Wilson at Creative Expressions. You get the very intricate die and then a frame to cut the outline.

I opted for a double Z fold card and used an 8" card as my base and cut a strip from another card to make the second Z fold.

The papers throughout the card are mainly from the Creative Citrus Pack from HOTP. This is one of my very first paper pads I bought and it came from the USA as in those days you could buy from there really cheaply as it was a really good exchange rate, shipping wasn't too expensive and you very rarely got stung by customs charges. There were very few decent supplies in the UK for cardmaking and scrapbooking was huge over there so every now and then I would place an order for some goodies.

The die was cut from cream card and I coloured the roses and leaves with Promarkers and added some Stickles glitter glue. The lettering has been sparkleified with a clear glitter pen from Spectrum Noir. I the added gold glitter glue to the flames. The backing frame was cut in gold cardstock. The striped paper is an offcut from a K & Co pad Studio K. 

The 50 star is from a piece of wrapping paper I kept from my hubby's birthday a few years ago. I added it to a scrap piece of card to strengthen it.


The inside of the card has lots of elements. One of the main ones is a bike stamp which is from Hip Hip Hipster Stamps at Kate Hadfield Designs. This is a really cool set and I can see me using more elements from it for future cards. We are a small family and we have clubbed together to buy her a mountain bike she wanted for her birthday. I have seen a photo of it an coloured it the same so it will be very personal to her.


The cocktail glass is a shaker die and stamp set Let’s Make Cocktails from Crafters Companion. It was in a mystery bag last year and at £14.99 to be honest I would not have bought it.  When you get loads of things in a mystery bag there are always going to be things you don't like, different styles of products you would not have bought and in this case nice little surprises that may come useful one day.

This has been cut with gold card an acetate window. I used a mixture of seed and bugle beads for the shaker. Despite wiping round with an anti static bag there must be a little bit of adhesive at the top as a couple of the beads keep sticking but they just look like bubbles so happy accident LOL. The cheers word is is a die from this set.


The scrabble sentiment is and old freebie from Tlc Creations. Paulette is very generous and has given away so many freebies over the years. If you are not a follower it is definitely worth doing so as she has images and some great sentiments. I coloured the tiles with a Promarker.


As a final touch I added a Little Miss character 'Little Miss Sunshine' as that is who she is. She has had some awful times in the past and been trod on by some nasty people but she is the most amazing resilient person and has an amazing gift to be able to help others. She has a website Choozing Happy and currently is having her first book published. We are so very proud of her and the person she is. The Mr Men set came from a themed edition of Let's Make Cards some years ago ad this was a last minute addition after I had taken the main photographs. The shape of the card meant the only way I could include it in the photos as to open it out completely. Shaped cards can be awkward to photograph sometimes.....

Ironically the addition of this character is poignant too as the Mr. Men characters are also 50 years old this year. Me an hubby were watching a programme about them and being of that age we all grew up with the books and watching them on the BBC. I realised that many of the bold and colourful style of images I like to colour stem from that and there is probably a lot of artists who have been influenced from that style. It's funny how I hadn't associated the connection until I saw this programme.

Card Details -


Size - 8” double Z fold 

Digital Image - Bike from Hip Hip Hipster Stamps (Kate Hadfield Designs)

Digital Sentiment - Old Freebie from Tlc Creations

Dies - Another Candle (Sue Wilson for Creative Expressions), Let’s Make Cocktails (Crafters Companion)

Paper - Cardmaker’s Citrus Creative Pack (HOTP) & Studio K 12” (K & Co)

Colouring Medium - Promarkers, Gel Pen

Embellishments - Stickles Glitter Glue, seed & bugle beads


I would like to enter this card into the following challenges (in Alphabetical Order)


Thursday 20 May 2021

Go Fly a Kite


If you completed a card using the Digi of the Month you automatically get the following month emailed to you. If not you can purchase that stamp for a reduced price.

The set we have been given to pay with this month is Go Fly A Kite. You get images in outline and colour as well as loads of sentiments which can be used with the stamps or many other projects.


I liked the little doggie and mouse and thought it would be quite cool to have the mouse flying on the kite as it is a small animal it could happen (well maybe in my world !)

I played about in my graphics program to trim the the mouse from the digi, flip it and position it hanging from the kite. In retrospect I probably should have made him a little bit smaller so he looked tinier compared to the dog but hey ho.... I am pretty happy with how it turned out.

I sized it to fit onto a DL slimline card. I have used the colours of red white and blue so it is a more masculine card. The image has been coloured with Promarkers and I used some blue chalk to make clouds in the sky.

The card front has been covered with paper from a paper pad that is probably around 18 years old from HOTP. I remember buying one of every colour I could find at the time. All my paper pads are split up by colour and type of pattern but I can almost always tell what pad it came from even after all these years. I found by splitting them up I use them a lot more. I generally know what type of pattern I want so like in this case all my blue striped papers are together so I can pull out that section and rifle through to select the one for my project. They have been sorted this way for over 3 years and it is honestly the best thing I did with them. I use Evernote to organise my supplies and scanned in the contact sheet (where there was one) and have a record of each paper pad that I split up. 


The sentiment is one that I have had printed for a long long time. It was an old freebie (2011) from a blog Beyond The Fringe Crafts. Carmen still has a blog and there are lots of freebies but I cannot find this one on there. A lot of the digi artists from that time are no longer about so it is nice to see some have still survived.

Where I live today is extremely windy and heavy rain. I have had to rescue my flower pots as they were blowing over and they are expecting more rain and even heavier winds during the evening. I just hope we don't see any REAL mice or dogs flying past on this blustery day.

Card Details -


Size - DL

Digital Images - Dog & Mouse from Go Fly A Kite (Imagine That Digistamp)

Digital Sentiment - Previous Freebie (Beyond The Fringe Crafts)

Paper - Purple & Blue Paper Pack (HOTP)

Colouring Medium - Promarkers & Chalks


I would like to enter this card into the following challenges (in Alphabetical Order)