Showing posts with label Thank You. Show all posts

Thursday, 17 November 2022

Autumn Thankyou


I was absolutely delighted to be asked to be a Guest Designer at Krafty Chicks this month. What an honour to join in the fun at the hen house. 


Week 3 of the monthly challenge schedule is CAS Clean & Simple.  I actually really struggle with this sort of card and never really know what is classed as CAS. What is CAS to one person is different to another depending on their style I think.

However I have worked in it being One Main Focal Point, Lots of open space (no pattern) & Minimal layers so I hope this will suffice. I found it very difficult to not use a pattern or texture for the background and so much open space..... just not my normal style at all.

As it is approaching Thanksgiving I was inspired to make a Thankyou card with an Autumn feel. We do not celebrate it in the UK but there is always someone you need a thank you card for and I always have some on hand. As I look outside my craft room window I overlook the back garden and a large cherry tree which is all shades of green, yellow, orange, red and brown. The really strong wind we have had recently seems to make the trees shed their leaves so much more quickly. We live by Sutton park which at 2400 acres is one of the largest urban parks in Europe. There are so many different varieties of trees and the deadfall leaves are so many pretty colours. It really is a beautiful sight at this time of year.

I am on the design team at Kate Hadfield Designs and have access to so many beautiful sets and this card has been made using those.



Fantabulous Fall is a lovely set of images available in both pre-coloured Doodles and black outline stamps you can colour yourself.

I used my favourite leaf in this set, leaf 7. I really like the shape of Maple leaves as they are so detailed.


I use Affinity Designer as my graphics program and created a rectangle shape which was sized to fit my kraft card base. I used the yellow paper from Fantabulous Fall and changed the opacity to 40% which gave it a lighter and more mottled effect. 


I then placed the leaf onto it in the bottom left hand corner and added a textbox. The orientation of the leaf is pointing towards the textbox which is a great way to lead your eye to the sentiment. I simply typed this into the text box playing about with style of fonts and sizing until I was happy with it.

Once the elements were in place and I liked the finished result it was a case of printing out with my laser printer, trimming to size with a guillotine and adding to my card stock base.

I do hope you will join me and the team in the Hen House at Krafty Chicks.

Card Details -


Size - A6

Digital Image - Fantabulous Fall Doodles (Kate Hadfield Designs)

Digital Paper - Fantabulous Fall (Kate Hadfield Designs)


I would like to enter this card into the following challenges (in Alphabetical Order)


Wednesday, 3 November 2021

An Autumn Thank You


It is time for another challenge over at The Paper Funday.
Our challenges are always Anything Goes with an optional twist. 
The twist this time is the theme 'Give Thanks / Grateful'


We are very fortunate to have 2 sponsors for each challenge this year which means we get to choose which artist we would like to work with. This really is great as it gives us double the choice. We are very lucky with the amazing sponsors that are lined up this year, many of which are old favourites and some are new to me. This month our CASual Friday Stamps The Artsy Stamper

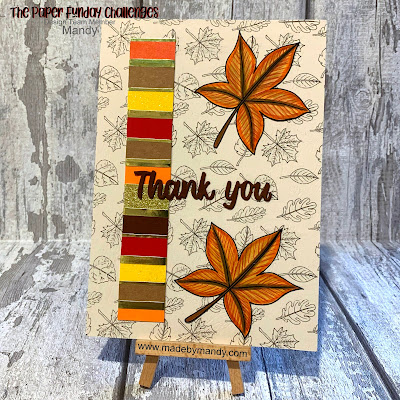
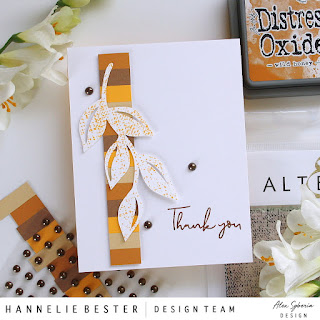
I chose to do the Thank You twist for this challenge. I had seen this amazing card by the Desert Diva Hannelie Bester and absolutely loved the colour block border and really wanted to incorporate it into a card. Now she is the queen of CAS cards and such an inspiration. I'm not exactly known for my CAS abilities but it is fabulous to see other cardologist's cards and use that as a starting point.


In the UK it is all things Autumn at the moment. We have had a cold snap that has heralded the start of the Autumn colours. I just love this time of year and the colours are spectacular.

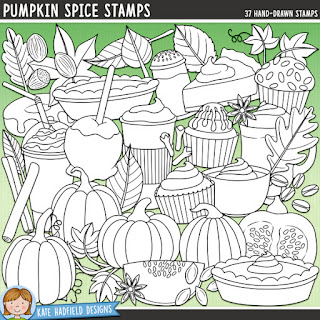
It seemed therefore appropriate to have an Autumn theme to my thank you card. I used one of the leaves from the Pumpkin Spice Stamps set from Kate Hadfield Designs. I really like the shape of maple and sycamore leaves and had so much fun colouring it. I started with laying down the promarker base in mustard, amber and cocoa. I then used Arteza Expert pencils and a red fine line pen to add the veins to the leaves. I then added more layers of shading with the pencils and pens so that it was nicely blended. I found by accident on another project that Promarkers blend the pencils into the markers really well and softens the overall effect. Not sure if this is the same as gamsol and paper stumps but I am really happy with the effect.


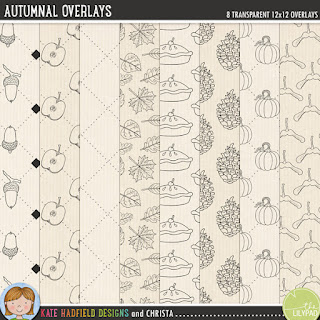
I have a large paper collection and lots of leaves but I wanted a more plain outline effect in a light tone so it would not detract from the coloured leaves. I have some quite thin leather textured cardstock and decided to try printing a leafy pattern from the Autumnal Overlays pack. I am really astounded by the effect that has been achieved by simply running it through a laser printer. I changed the opacity to 50% so it laid less colour down and I got a really subtle backing paper for my card.


The colour border is a 3cm wide strip of white card for the base. I added some double sided tape to it and then went through my coloured scrap bags to pull out an assortment of brown, red, orange, yellow & gold offcuts. It was simply a case of laying them in place and trimming them. I decided to add some strips of gold peel off stickers in 2 different widths to add a bit of sparkle. Finally the sentiment is a die cut, cut out tree times and layered to make it thicker.

I hope you will join myself and our fabulous Team over at the Paper Funday Challenge.

Card Details -


Size - A5

Digital Image - Pumpkin Spice Stamps (Kate Hadfield Designs)

Digital Overlay - Autumnal Overlays (Kate Hadfield Designs)

Dies - Thank You (Crafter’s Companion)

Colouring Medium - Promarkers Arteza Expert Pencils 

Embellishments - Peel off Stickers


I would like to enter this card into the following challenges (in Alphabetical Order)


Wednesday, 19 May 2021

An Art Joodle Thank You


At Kate Hadfield Designs there are so many fabulous sets it is really easy to get inspired to use them. There are digital stamps which you can colour, coloured versions you can scrapbook or make into digital layouts. Papers, patterned overlays and doodles galore. No matter what your skill level there are so many goodies to play with.


I needed to make a thank you card for family friend who has made some lovely indian food for us and thought this lovely pre-coloured set Art Joodles Mixed Bag 2 would make a bright and colourful card. The flowers are really pretty and as they are pre-coloured once printed you can make a card really quickly.


You get loads of pretty flowers, leaves and tendrils, border strips and circles in this colourful set, perfect to add to digital layouts and I thought might work as a nice card too.

I have used a 6" x 4" blank and sized the elements accordingly. They are printed on photo paper which has a semi gloss sheen and the colours print really vibrantly. 

The base of the card has been covered in a pale pink polka dot paper. I added the border strips top and bottom making sure they are place in the opposite direction to one another.

The leaves have been placed directly onto the background and the flower has been raised up on foam squares to add dimension. 

Finally I added a gold peel off sentiment and a small flower motif in the bottom corner which has been coloured inside with Promarkers.

Over at Kate Hadfield Designs there is lots going on. Kate is really generous with her freebies which are readily available. If you sign up to the newsletter you get access to an extra subscriber area the Doodle Den where there are loads more freebies. There is a gallery full of projects by the Creative Team and customers and so much inspiration for crafters and teachers. I would highly recommend you pop over there and join in the fun.

Card Details -


Size - 6” x 4”

Digital Images - All from Art Doodles Mixed Bag 2 (Kate Hadfield Designs)

Paper - Summer Bloom 8”x8” pad (Papermania)

Colouring Medium - Promarkers

Embellishments - Gold Peel off Stickers


I would like to enter this card into the following challenges (in Alphabetical Order)


Thursday, 18 March 2021

Honey Bear Thank You


Imagine That Digistamp have a Progressive Challenge each month. 
If you completed a card using the Digi of the Month you automatically get the following month emailed to you. If not you can purchase that stamp for a reduced price.

The set we have been given to play with for March is Honey Bear. You get papers, images and sentiments which can be easily mixed and matched with other projects.


The starting point for me was the hexagon shape. I have a set of Torn Edge Hexagon dies that I have never used before from a mystery bag at Crafter's Companion which I thought would work well with this set.

I printed the coloured bear image on glossy photo paper. Kris' images are really colourful and I find the photo paper really brings out the vibrancy. I enlarged one of the bees in the image to use as an embellishment and also printed out a strip of the hexagon paper.

I used the largest of the dies to cut the image out and then made a slightly larger one from brown card which was trimmed with deckle edge scissors (remember using them all the time in the old days?) I added some sparkle around the edge with the clear glitter overlay pen from Spectrum Noir.

I used an A4 sheet of kraft card for the base and added the image panel to it. The stripe of yellow paper was matted onto a strip of the brown card. I then used a small die to cut the bee, matted onto more brown card and popped up using foam pads. The foiled sentiment (which was awful to photograph!) is from Kanban.

As a final touch I used some gold glitter glue on the flower centre and some REALLY old Stickopotamus bee stickers.

This is the perfect card to thank someone for being so sweet. 
We always need thank you cards in our stash

Card Details -


Size - A5

Digital Image - Honey Bear (Imagine That Digistamp)

Digital Paper - Honey Bear set (Imagine That Digistamp)

Dies - Torn Edge Hexagon (Crafter’s Companion)

Embellishments - Stickopotamus bee stickers, Stickles glitter glue, Spectrum Noir clear glitter overlay


Thursday, 14 January 2021

Heart Flower


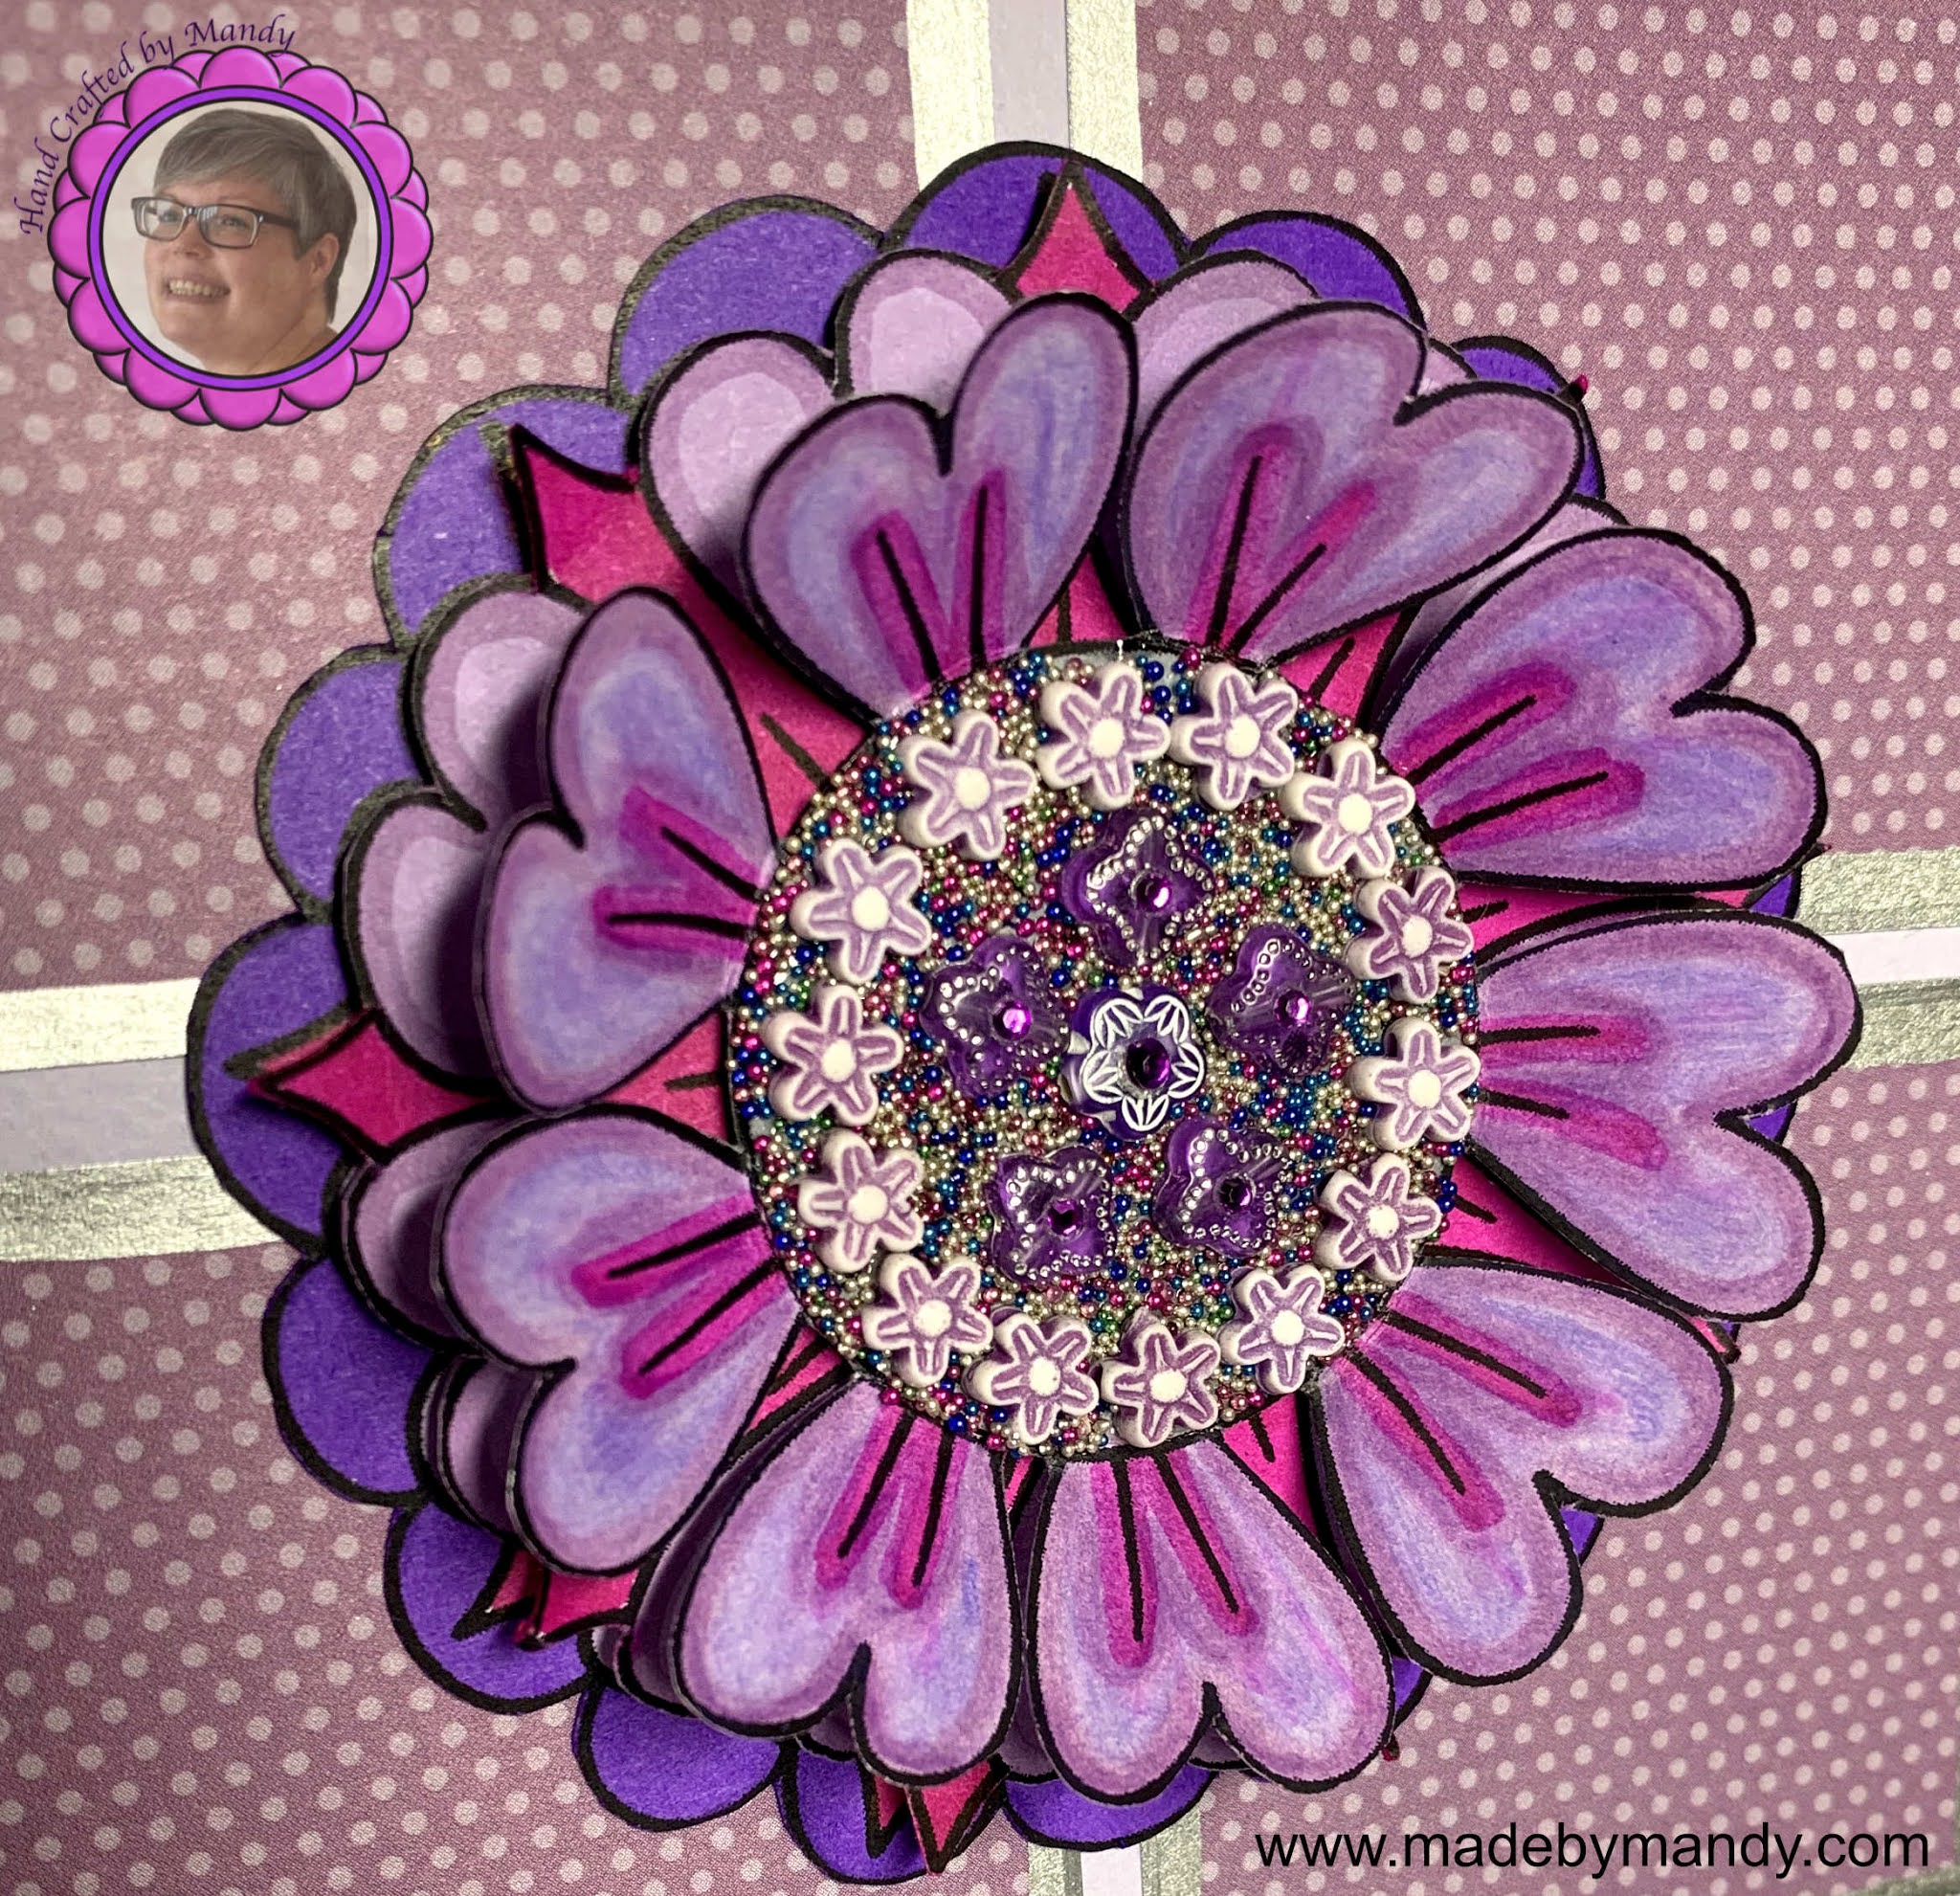
This card has been made using the single flower image from the Heart Flower set by Pinksy Doodles. It is a lovely set with the main plant and the single flower. As soon as I saw this I just knew what I was going to do with it.


I printed the image 3 time to create layers. The back layer is the full stamp,  layer 2 follows the spiky flower petals and layer 3 is the heart flower petals and the centre.

All layers are coloured using a combination of Promarkers and Spectrum Noir markers. The final layer has lots of shading with Arteza pencils. All layers were fussy cut and raised up on foam pads.

I filled the centre with glossy accents to act as a glue base. I then used a combination of small flower beads and then filled in the rest with tiny accent beads. I added some tiny purple gems to the flower beads to add a bit of sparkle. You can see the centre in more detail in the image below.


I used a spotty patterned paper cut into 4 squares laid onto the lilac card base. These squares have been edged with a Pentel silver paint marker.

The sentiment is from Brenda's Sunny Sentiments pack from the Pinksy Doodles Etsy store. You get loads of lovely sentiments perfect to cheer someone up

I printed the sentiment, edged with the silver marker and added some tiny purple star gems in the corners.


This card is for a neighbour and friend who cheered me up with a bunch of flowers when I needed it. She is a teacher, working from home with 2 kiddies and I imagine she is a little overwhelmed at the moment. I wanted to thank her for her lovely gesture when I needed a boost and will be returning that with this thank you card and some pretty flowers. The sentiment on the front is particularly apt and I decorated the card centre with a typed sentiment, edged with the silver pen. This is a pre-bought card blank that I don't usually use as I think they are too thin so I added a white one on the inside as the 'insert' and then added some more of the patterned paper to the inside.


I do hope you like this card. I really enjoyed making it as the bold flower outline really lent itself to layering in this way. It took quite a while to do but crafting brings me so much joy and I know the recipient will appreciate the work that has gone into it.

Card Details -

Size - 5" x 7"
Digital Image - Heart Flower (Pinksy Doodles)
Colouring Medium - Promarkers, Spectrum Noir Markers, Arteza Pencils, Pentel Silver Paint Marker
Embellishments - Flower beads, Accent Beads, self adhesive gems


I would like to enter this card into the following challenges (in Alphabetical Order)

Sunday, 20 September 2020

Signs of Autumn


Over at the Outlawz Challenge there is a monthly Progressive Freebie Challenge. If you have taken part in the previous month you get a new image to play with. This month we have an image and 2 sentiments from the Signs of Autumn set by Jan's Digi Stamps.

Autumn is my favourite season. I love the slight crispness that you get in the air, the sun is not so hot and burny and the leaves start to turn into the most magical of colours. Also at the end of the month it is my birthday and also my wedding anniversary so lots of good things to look forward to.

This image was an absolute delight to work with. I coloured the image using a combination of Promarker and Spectrum Noir pens. I wanted to use lots of colours to emulate the leaves in yellows, oranges, reds, greens & browns. The jar is coloured a very pale grey with a darker seal. I added some silver gel pen to the metal clasp. The jar has a layers os subtle sparkle from a Spectrum Noir clear glitter pen. This really doesn't show up on photos well at all but I promise it is there in real life.

The base of the card is brown card stock from Aldi cut into a 6" square. This gives a nice strip of scrap card stock so this was used to mat the image.

I used sketch 475 from Try Stamping on Tuesday for the layout


The glittery leaves patterned paper is from a Dovecraft Pack Neighbourwood which has lots of leafy patterned papers in it, perfect for autumn projects.  The 'ribbon' is an offcut of paper from the Papermania Birdsong pad. 

Following the prompt on the sketch I added 3 square brown gems and a little sentiment tag from a HOTP Earthtones Creative Pack. When I first started making cards 20 years ago I bought a few of those pads and still have loads of tags and papers left. I mounted this onto a scrap of gold card and added a gold self adhesive puffy dot. The tag and image are mounted onto 3d foam for added dimension.

Card Details -

Size - 6" Square
Colouring Medium - Promarker, Spectrum Noir, Silver gel pen, Spectrum Noir Clear glitter overlay 
Embellishments - gold puffy dome sticker, square gems

I would like to enter this card into the following challenges (in Alphabetical Order)


Wednesday, 22 May 2019

Tea Time Thankyou


One of Paul's work colleagues is from Sri Lanka and recently went to visit family over there.

He brought a gift in for Paul of some Ceylon tea. He is not keen on tea but I love it. I had never had Ceylon tea before but found it was absolutely gorgeous. Such a fresh clean taste and completely different to my favourite Yorkshire tea.

Of course I dis some research and found it is not easy to get Ceylon tea in the UK and you certainly cannot get the plantation fresh Zesta. It looks like I might be able to get some from Whittard though so will pop in there when I next go to Birmingham shopping.

However, Sanjeewa surprised me by giving a second box of tea to Paul for me. I was so blown away by this lovely gesture from someone I have not personally met that I wanted to make a card to show my gratitude.

I had my car serviced last week and popped to The Range and found this little teapot die for only £1 so that was a perfect starting point.


I used the May sketch from STAMPlorations as inspiration for the layout although I didn't have enough space to get the layout quite on point. Hope you will forgive me for using a bit of artistic license

The card base is covered with some red spotty card which has been recycled from an old Christmas card. This was actually the inside of a card...... too good to waste in the recycling bin so recycled in my craft drawer instead. I have distressed the outside edge with an almost dry mini ink pad. I'm not really one for the grungy look but find this helps to knock harsh edges back a little.

The square white panels have been cut using a Spellbinders Nestabilities die from the Lacy Squares set. I drew around the inside of the frame with a gold gel pen. The Teapot is an Xcut Dinky die. I cut 1 out in red and another in a dark green to provide the contrast for the hearts. The etched lines on the teapot lid have been highlighted with a white gel pen and a Sakura clear glitter pen has been used on the hearts.

The second panel is embellished with one of the tags from the tea making it completely personal to the recipient. The third panel has a chipboard teacup embellishment from my stash.

I used a rubber stamp from Hero Arts for the sentiment. This was printed onto plain white card, coloured tea brown with a Flexmarker and the added a red glitter gel pen. This was then fussy cut an all panels mounted onto 3d foam squares. Finally a bit of bling added to the corners as it looked a bit too CAS for me....

The recipient loved his card and that makes me very happy.

Materials Used in this Project are as follows:- 
Card size – 6" x 4"
Paper – Recycled card from an old Christmas card
Die Cut - Teapot XCut Dinky Die (only £1)
Sentiment – Hero Arts Sentiment cling rubberstamp CG132
Tools – Rubber stamps, gel pens, Flexmarker, self-adhesive gems
Techniques – Rubber Stamping, Fussy Cut

I would like to enter this card into the following challenges (in Alphabetical Order):-